
If you just got a Ninja Foodi Air Fryer or are thinking about getting one, I can help you understand how to use your one to Air Fry. Not because I have one of them, but because now I have 3 Ninja Foodi Air Fryers!
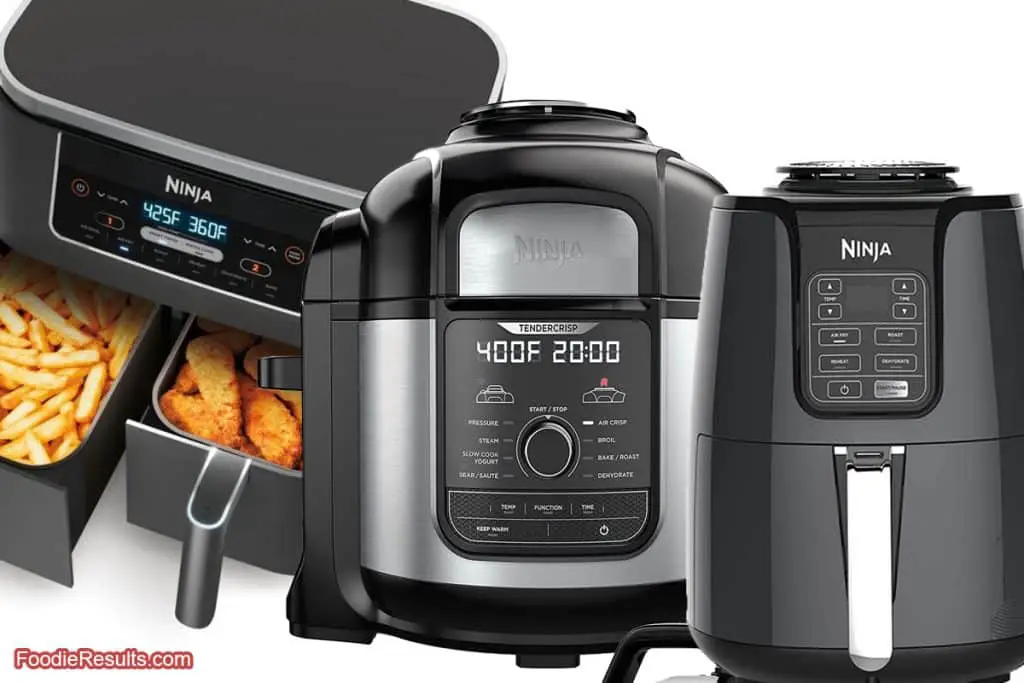
I have the Ninja Foodi pressure cooker with Tender Crisp (air frying), Ninja Foodi Digital Air Fryer Oven, and the Ninja Foodi Grill. Each has its own characteristics, but the concepts I have learned from using all of these over the last few years can help you decide on a purchase or help you learn how to cook a meal that didn’t come with “air fryer” instructions.
Please keep reading to find out how to air fry in your Ninja Foodi, but first, let me cover some basics that you should know.
The Basics For Ninja Foodi Air Fryer
As I said above, each Ninja has unique characteristics, features, and general use cases. However, the ones I listed and other Ninja Foodi Air Fryers work the same by using a fan and forcing hot air to quickly cook your food and give it a nice crispy outside, aka air frying.
Each Foodi can raise the temperature enough to burn whatever you are cooking, which is nice if you are going for very crusty edges or like a little char on your food.
Because we are “frying” with air, you are going to be cutting your overall fat consumption, and for some dishes, this means changing the flavor profile, but in most cases, this is a good thing, and you can still sprinkle or glaze your food with a bit of oil, especially at the end. For instance, in the last minutes, use olive oil by spraying or drizzling a little on the top of your dish. It can give whatever you’re cooking an even crisper edge while skipping the risk of smoking your oil , saving you health issues.
Last, if you use an electric oven, these Foodis, or Air Fryers in general, can save you a little money. They preheat quickly and often cook food faster. In general, things like french fries can cook tens of minutes faster, and you can save hours by pressure-cooking meals and finishing them with the Tender Crisp.
Each Ninja has a Keep Warm function that you can read about in our article: Keep Warm
If you get one of the Ninja Foodi models with the pressure cook function, you can also use it as a slow cooker which you can read about here: Can You Use the Ninja Foodi as a Slow Cooker?
If you are ready to learn how to use the Ninja Foodi Air Fryer function, keep reading, and I’ll walk you through some considerations and basic instructions.
Following These Instructions for your First Use of the Air Fryer:
- Clean your Air Fryer thoroughly with soap and water. Dry it completely and assemble all of the parts.
- Check the manual to ensure you have followed your setup instructions and removed all packing material and tape.
- Preheat your new unit for at least 5 minutes to clear any residue that might be left from the manufacturing process. I do this with new products because I do not want to taste anything “off.”
- Optional(I do this!): Clean the Air Fryer and pans again.
How To Air Fry in Ninja Foodi
- Prepare your cooker – Choose if you will use the supplied basket for air crisp, Grill Grate for grilling or baking (turned upside down), Rack for dehydrating or roasting, trivet (Learn about options here: Trivets), or you can use the bottom pan only.
- Choose your setting – For most units, you will want to select Air Fry; for a chart on temperatures and times, check out our resource: Air Fryer Temp and Time by Food; sometimes, the instructions for your food will be easy to find on the box or bag, however, in general, you can follow these basic guidelines:
Medium to High heat 10-15 min. for burgers, hotdogs, corn on the cob, and most prepackaged foods
Low to Medium Heat 5-15 min. for most deli items, sausage, grilled cheese, and potatoes, depending on preference - Allow your unit to preheat for about three to ten minutes, depending on the model and temperature. The grill is typically 10 minutes, the Digital Oven is 3 minutes, and the 8 Qt model generally is 5 minutes. Most units will let you know once they are ready, and for some foods, you will not need to preheat. I recommend experimenting. On the Foodis, once preheated, they will display “Add Food” and beep.
- Open the lid, place your food inside, and an automatic timer starts to tick off as soon as you close the lid. This timer is set to 10 minutes by default, and you can use the “time” buttons to adjust it during cooking.
- The timer pauses when you open the lid during cooking, and you will lose heat. The timer will restart once the lid is closed. Even though you will lose a little heat starting out, I recommend looking at the food every 3 minutes or so.
- When the time’s up, your Ninja will beep and automatically turn off, and some models will say Food Ready others say “End.” Most other Air Fryers I have similarly used work, which should be obvious when done.
- Check your food for doneness, and cook longer if needed. Please note how long it took to cook and use that time for the subsequent trial.
NOTE: Air fryers have an average of 2-5 minutes preheating, but Ninja Foodi Air Fryer’s standard preheat time was only 3 minutes. Preheating will help ensure that your food comes out crispy and delicious. I, however, skip preheating on things like french fries and toast, adding them right away and letting the machine go through its preheat cycle with the food in there.
Please keep reading to learn more about Air Frying, including some general knowledge followed by a few limitations, of which you should be aware. Last I will give you a few recipes that you can try.
What is Air Frying Anyway?
Air fryers make “fried” foods without the added fat and calories from deep fat frying in oil. Instead, hot air circulates at high speed inside the oven through convection fans. This circulating forced air means that we no longer passively irradiate our food with heat but instead force hot air to directly contact the food, drawing away moisture and resulting in a crunchy exterior.
When using an air fryer, you will notice the side which gets the most direct and hottest air will cook more than the other sides. This uneven cooking is normal; you can use it to create new dishes or ensure you get more of that lovely finishing touch we all crave. For instance, I love burned cheese dishes, as shown in my nacho video: Air Fryer Nachos!
You can often rotate the food during cooking to ensure you have an even cooked surface. As stated above, the Foodis will pause cooking when you open the lid.
Air Frying is similar to baking and roasting in a convection oven. However, the fans driving the air are pushing that air harder and faster, resulting in a very different outcome. But don’t worry, all of the Ninjas I listed have settings to do those other functions, and they do an excellent job at each.

Limits of Air Frying
- It is easy to overcook – Beware and keep an eye on your food. Say you do a batch of fries, make sure you mix them around after five or so minutes of cooking. Generally, it is easy to overcook the things on top, which is good because it will be easy to keep an eye on them.
- Thick items might need another approach – I love cooking a thick chuck steak in my oven by searing it in the cast iron pan and then throwing the entire thing into the oven. However, I’ve tried several times to get a similar effect from my different Foodis. However, I find it better to use thinner cuts and air fry them. You can also try pressure cooking and then air frying. The Ninja Foodi opens a whole new world of possibilities.
- Your oven is about to get lonely – My wife and I use our oven less than we ever have, and we have a lovely range now. I sometimes get flashbacks to “The Brave Little Toaster” and imagine my oven looking at the air fryer with disappointment for being left behind.

Some Quick Foods That You Must Try
If you are new to air fryers, listed below are some easy “tried and true” recipes you can try. These are good suggestions for a first-time experience with your Ninja Air Fryer.
- Fries. Use the cooking basket available for your model. Set the temp setting to Medium/Medium:High (aka 400°F) and let the unit preheat while spraying your fries with some olive oil (which is healthier than vegetable oil); once preheated, add them to the cooking basket and set the timer for 14 minutes. Note: As I mentioned above, you can wait to put the oil on the fries, but quality Olive Oil will not smoke at 400°F, so you should be ok to add it beforehand.
- Cheese sandwich (aka grilled cheese). Preheat your unit to Medium/Medium:High (aka 400°F); put some butter or mayonnaise on both sides of two pieces of bread. Once heated, put the bread in the fryer, separated from each other for about 2 minutes. Get two slices of your favorite cheese. Open your fryer up and carefully place your cheese on one of the pieces of bread. Now using some tongs or a fork, you can put the other piece of bread on top of the cheese. Close the lid again and let it cook for 3-5 min, depending on how crispy you like.
Recent Articles
Casseroles are the original comfort food. Discover a new favorite from this selection of some of the best casserole recipes your family needs to try. From breakfast bakes to delicious dinners,...
There are many delicious recipes that you can make with your Holiday leftovers! Here are some ideas from popular food websites: Food Network has a collection of 61 Best Thanksgiving Leftover...
